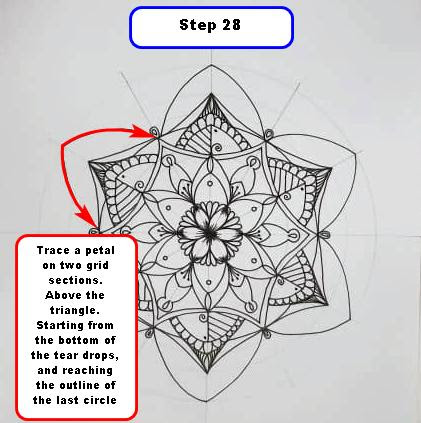
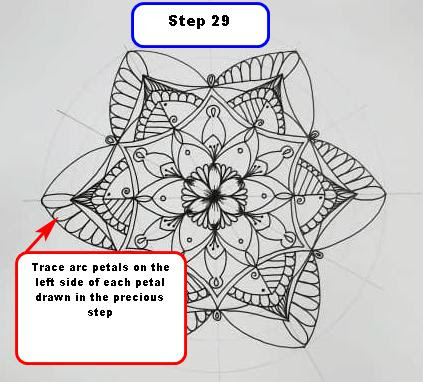
This is a step by step easy tutorial on how to draw this creative Mandala design.
The pictures posted in this article offer you detailed instructions on every step needed to draw the Mandala.
This tutorial is divided into 36 easy steps, but before diving into the drawing process let's learn few basic knowledge about Mandala and Mandala drawing.
The basic materials you need for every Mandala are the following:
A4 paper
Compass
Protractor
Pencil
12" Ruler
Fine drawing pen 0.2
For those of you who already asked me about the best compass, you can try to purchase the following compass as it is good for your canvas and for mural drawings.
The compass, and protractor will allow you to trace the base structure in every Mandala, called mandala grid, that helps achieve symmetry in a simple way.
The grid is composed of a number of circles, which sizes differ based on the design you're targeting, and a number of lines that should be separated but equal angles.
In all the simple Mandala tutorials, I start by taking the center of the paper.
This center will be the one and unique center around which all the circles of the Mandala will be organized.
The measures required for the circles are as follows:
Radius lengths: 1.5 cm, 3 cm, 4 cm, 5.5 cm, 6 cm, 7 cm, and 8.5 cm
As for the grid lines, they are separated by 30 degrees.
Below you will find the different steps of this beautiful Mandala art. In a Mandala, you always start from the center and take the grid lines and grid sections as a landmark needed to trace your lines.
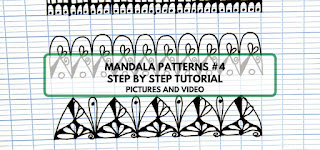
This article today is about Mandala patterns. Every now and then I create a number of Mandala patterns to help yo get inspired while drawing your own Mandala.
As you know every Mandala starts with a Mandala grid on which we place a number of basic shapes. In order to emphasize these shapes and give our Mandala an extra value, we add inside of these shapes patterns and designs similar to those in this article.
I will show you in details how to create these patterns. The tutorial is also available as a video version that you can see on my youtube channel. The link is shared at the bottom of the article.
Happy reading!
Pattern a:
This pattern is based on the long arc petal. When you apply this design on your mandala, make sure to trace every long arc petal on one grid section.
Pattern b:
This pattern is also based on the long arc petal shape. It is divided into 6 easy steps.
Pattern c:
This patterns is based on the regular petal shape. It is divided into 11 easy steps. This pattern is better drawn on 2 or 4 grid sections when placed on a mandala grid.
I added a small simple mandala sample created with these patterns to give you an idea of how a mandala will look. I will be looking forward to your mandala designs using these set of patterns
And here is the video tutorial. It is always useful to see and read how things are done. So here's the seeing part :D :D
What do you do when you're angry and sad? What is the mechanism you adopt to reduce your anxiety?
Practicing art in the time of stress is one of the most effective methods to reduce it.
But it doesn't need an artist to take art as a getaway method. Anyone, and yes, I mean anyone can draw.
In meditative arts, everyone is an artist. We are all creative and we can all express this creativity.
Just have faith in yourself.
In this Mandala tutorial, like in all my meditative art tutorials, I guide you step by step through the whole Mandala drawing process and I do my best to present the project to you in a simple way in order to encourage every person to try this art.
This work, as a meditative art teacher, is for me more of a message than a carrier. And when you try my tutorials and share them with me, you, in your turn, will help me smile :) :)
If you have tried my other Mandalas you will see that we always start by a Mandala grid. A Mandala grid is in fact the base structure of every Mandala that makes drawing easy and fun. The goal behind a grid is to make symmetry accessible effortlessly.
A Mandala grid does not have standard sizes. Each mandala design requires a different grid, based on the idea we want to reproduce on our canvas.
Now, get your pens and pencils ready and let's start!!
There are few materials that you always have to have by your side when drawing a Mandala.
To trace a Mandala grid you need a compass and a protractor. I will share with you a video tutorial that will help you learn more about a mandala grid. CLICK HERE for the tutorial
When I first started drawing a Mandala, I always wondered what the basic shapes are, that I could use in order to create my own designs. The basic shapes of a Mandala are simple, based on a number of geometrical shapes that you later can develop.
These are the basic Mandala shapes. Now as a beginner, you can start creating mandalas with just these shapes without filling them with patterns. After a bit of practice, you will be able to start adding patterns inside of each shape.
I will show you an example in the picture below. You are welcome to click on the picture to go to the tutorial that will show you, step by step, how these Mandala patterns were drawn.
So as you see the basic shape in all four patterns is the regular petal. The difference is the designs added inside to emphasize the shape and to give our Mandala a special touch.
Now I believe you are ready to start drawing so let's go! Remember to share the final drawing with me.
Directions:
Step1:
Always start from the center of your Mandala. I have added a picture of the basic shape we are using in the first step. The double pointed tear drop. Trace each tear drop on two grid sections.
** What is a grid section?
In the mandala grid, the intersections of the circles and lines form grid sections that we use as a landmark to place the patterns.
Step 2:
Draw regular petals on each four grid sections.
Step 3:
Inside of each drawn petal in step 2, add small arc petals (about four small arc petals in each regular petal). In order to draw arc petals that are symmetrical in height, it will be useful to trace, using your compass, a 1.3 cm radius circle, and consider the outline of this circle as a border line.
Step 4:
Trace the outline of the 1.3 cm circle you drew and color the blank spaces between this line and the arc petals in black.
Step 5:
In the remaining empty space of the petals drawn in step 2, trace arc petals to fill the whole space. Always start by the center, which is also the biggest arc petal, then trace those on the side.
Step 6: .Color the blank spaces in the petals in black.
.Trace tear drops between each 2 petals.
. Add a dot on top of each tear drop.
Step 7:
In the space between the second and third circle, draw arc petals, tracing one arc petal on each grid section.
Step 8:
Add one swirl on the bottom of each arc petal as shown in the picture below.
Step 9:
Add a double outline on top of each arc petal.
Step 10:
Add two small tear drops on the corner of each swirl.
Step 11:
Add a dot on the right internal side of each arc petal.
Step 12: In step 12 and 13 we will draw intersected regular petals. In order to do this, start as a first step by tracing curved line taking the left side of each arc petal as a starting point and curving the line towards the right.
Step 13:
Do the same as step 12 but in reverse. Taking the right upper side of each arc petal as a starting point and curving the line towards the left.
Video Tutorial
You are welcome to click on the video below to see how this Mandala has been drawn.
I hope that you are enjoying my tutorials. Remember to share them with friends in family in order to spread more word about the meditative art and encourage them in finding positive mechanism in reducing stress and anxiety.